
2.2L / 2.5L Underdrive Pulley Installation
|
If you are installing an Underdrive Pulley on your 2.2L / 2.5L engine, here is a helpful tip to help your new part fit and not rub on the aluminum housing that retains the front crank seal. These instructions assume that you have already figured out how to remove the stock crank pulley, and have access to pneumatic cut off and sanding tools. BadAss Performance will perform the installation for you for a nominal fee. |
| Before installation, purchase an Underdrive pulley from one of the FWD Mopar retailers that sell them. I got both of mine from Forward Motion. You will also need shorter belts due to the reduced pulley diameter. | |
| Begin the project by removing the belts and stock crank pulley. Once the stock pulley is removed, dry-fit the underdrive pulley to see if it rubs the aluminum bracket below the timing belt. If it does not, Woohoo! Install the new pulley! | 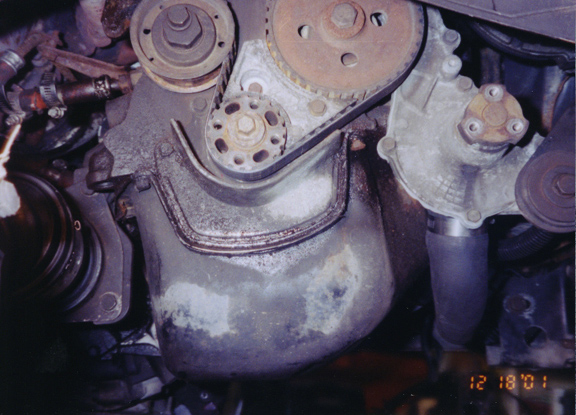 |
| If it does not fit with a clearance, you must make one, preferably with a pneumatic cutoff wheel. Start by drawing a line on the bottom of the aluminum housing that you think will leave about ~3mm (~1/8") clearance. | 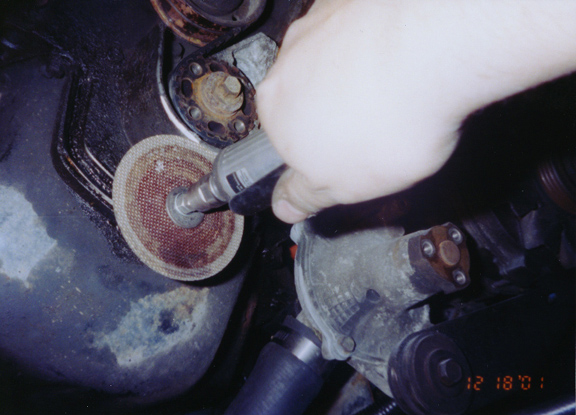 |
| Cut just outside your line because if you leave too much material, it is easier to take more off than to add some back. | 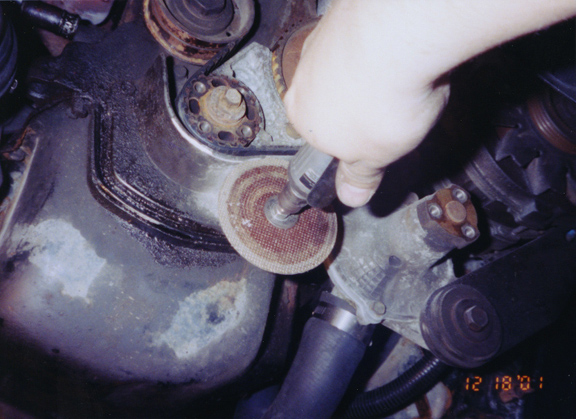 |
| Once cut, sand the edge so that it is square, flush, and smooth. |  |
| Dry fit the new pulley to make sure that you removed enough material. | 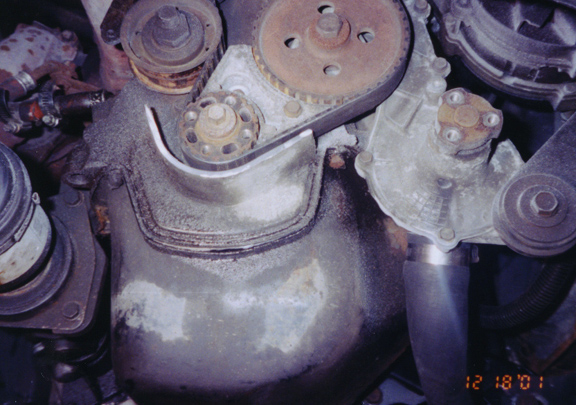 |
| Check to see that you have ~3mm (~1/8") clearance between the pulley and aluminum piece. |  |
| Additionally, If you have an older 2.2L/2.5L with those E-10 Torx head bolt, be sure to use the new 13mm hex (PC 10.9) bolts that Mopar has superseded them with. | |